n:m Relations
n:m Relations provide a flexible way to describe real-world scenarios where multiple Objects
relate to multiple others. Unlike simple links or single-reference fields, these relations:
Support bidirectional labels, icons, and colors
Can be restricted to specific type combinations
Allow for custom fields to store metadata about the relation itself
This enables you to model things like:
Servers ↔ Applications (with deployment details)
People ↔ Projects (with roles and responsibilities)
Devices ↔ Networks (with usage contexts)
To use these relations, you first define a Relation Type, and then create individual object-to-object links based on that schema.
Creating a Relation Type
To define how Objects relate, you must first create a Relation Type. This acts as a schema for your n:m relationship.
To access and manage Relation Types, navigate to Framework → Relations.
Click the “Add” button to open the creation form.

Picture: Overview of existing Relation Types
The form is divided into two main sections:
Basic Information: Here, you define the required configuration of the relation, such as names, allowed types, and visual settings
Content: This section allows you to define optional custom fields/sections that will be available for all object relations created under this type. These fields can be used to store additional metadata (e.g., status, purpose, notes).
Relation Name |
The name of the relation schema |
|---|---|
Label (Parent → Child) |
Human-readable label shown when viewing from the parent side |
Icon / Color (Parent) |
Icon and color for parent view |
Label (Child → Parent) |
Label shown when viewing from the child side |
Icon / Color (Child) |
Icon and color for child view |
Allowed Parent Types |
Allowed Types that can appear on the parent side of the relation |
Allowed Child Types |
Allowed Types that can appear on the child side of the relation |
Description |
Optional textual description of the relation’s purpose |
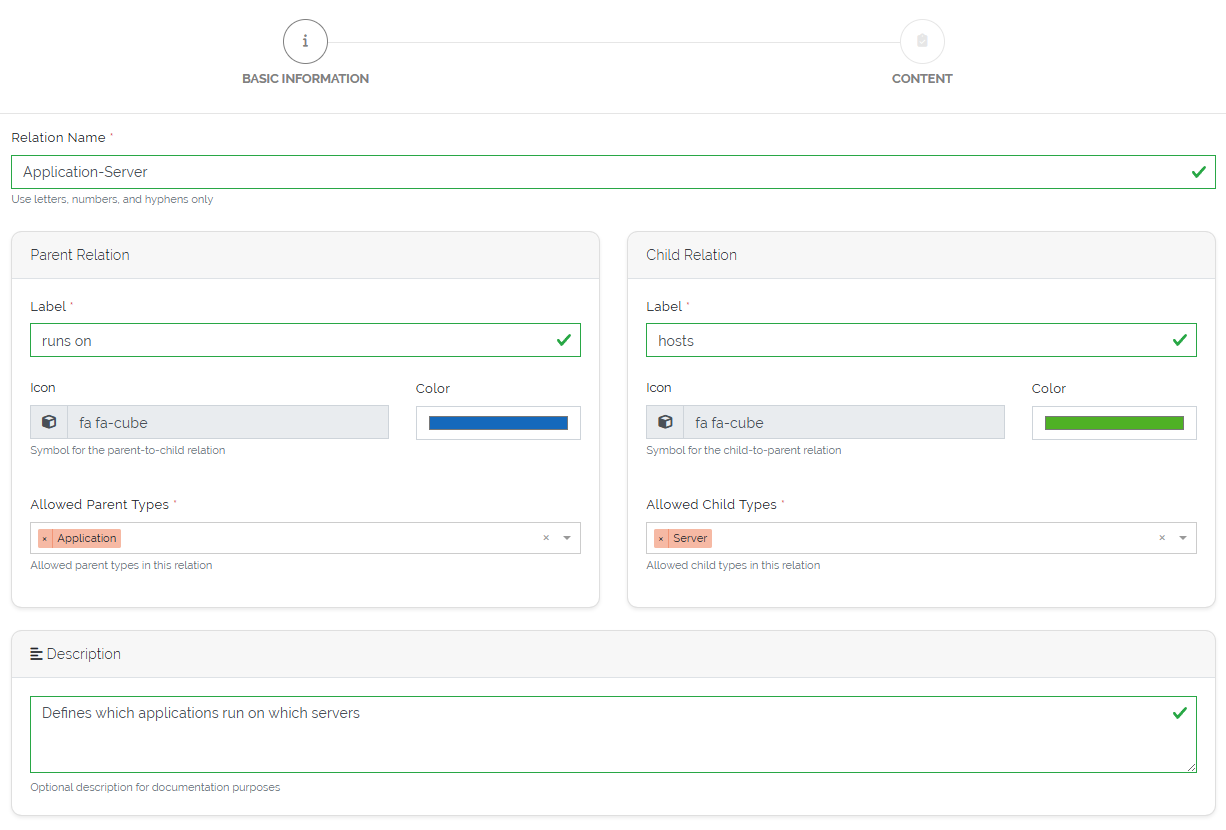
Picture: Basic information section of creation form for Relation Types
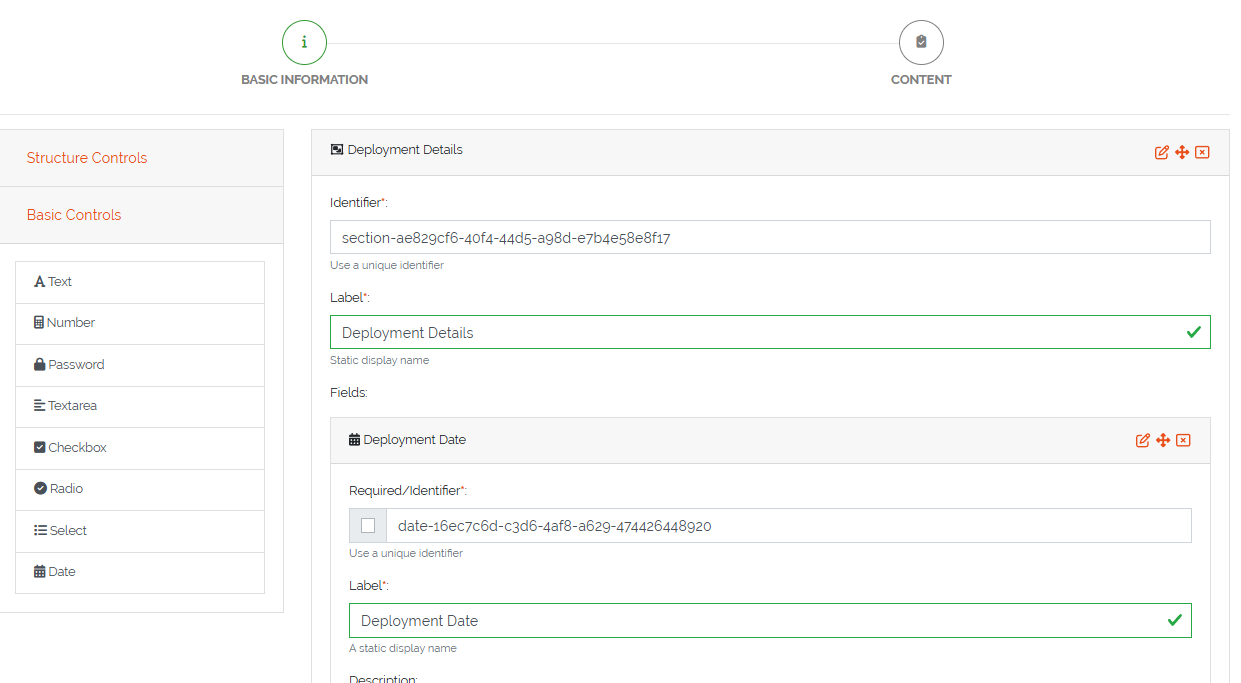
Picture: Content section of creation form for Relation Types
Note
You must define at least one allowed Parent Type and Child Type. These constraints control which Objects can be related using this relation type.
A Type can be part of Parent Types and Child Types at the same time.
Creating Object Relations
Once a relation has been defined, you can create specific object-to-object connections based on that relation.
To create a relation between objects:
Navigate to the detail view of a valid Object.
Click the “Add Relation” button at the top of the page.
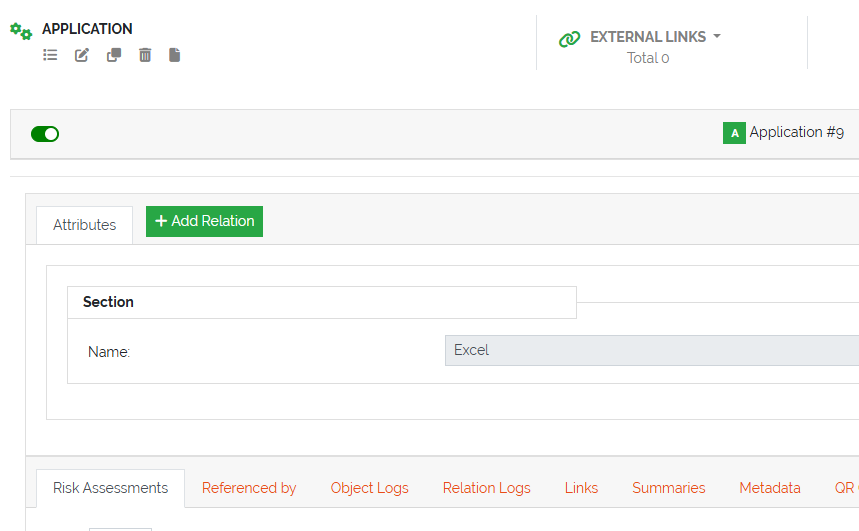
Picture: Add Relation button in the object view
Available Relations
In the next step, a table displays all applicable relations based on the role and Type of the current Object:
If the object’s type is listed as a parent in a relation, it will appear as a parent-to-child entry
If the object’s type is listed as a child, it will appear as a child-to-parent entry
If the object’s type appears in both the parent and child lists of a relation, two entries will be displayed — one for each direction
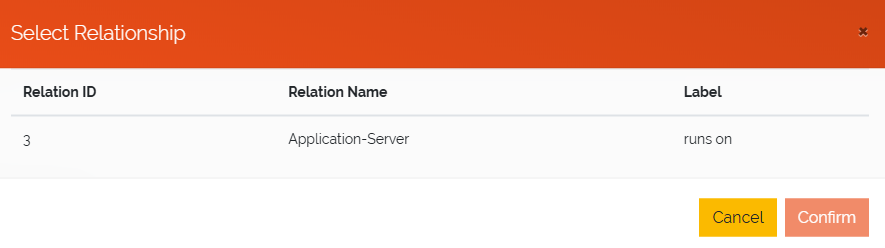
Picture: Available relations table for the current object
Completing the Relation
After selecting a relation from the table:
A form will open allowing you to fill in any optional fields defined for the relation (if available)
Select the target object on the other side of the relation (either parent or child, depending on direction)
Click “Save” to establish the relation between the two Objects
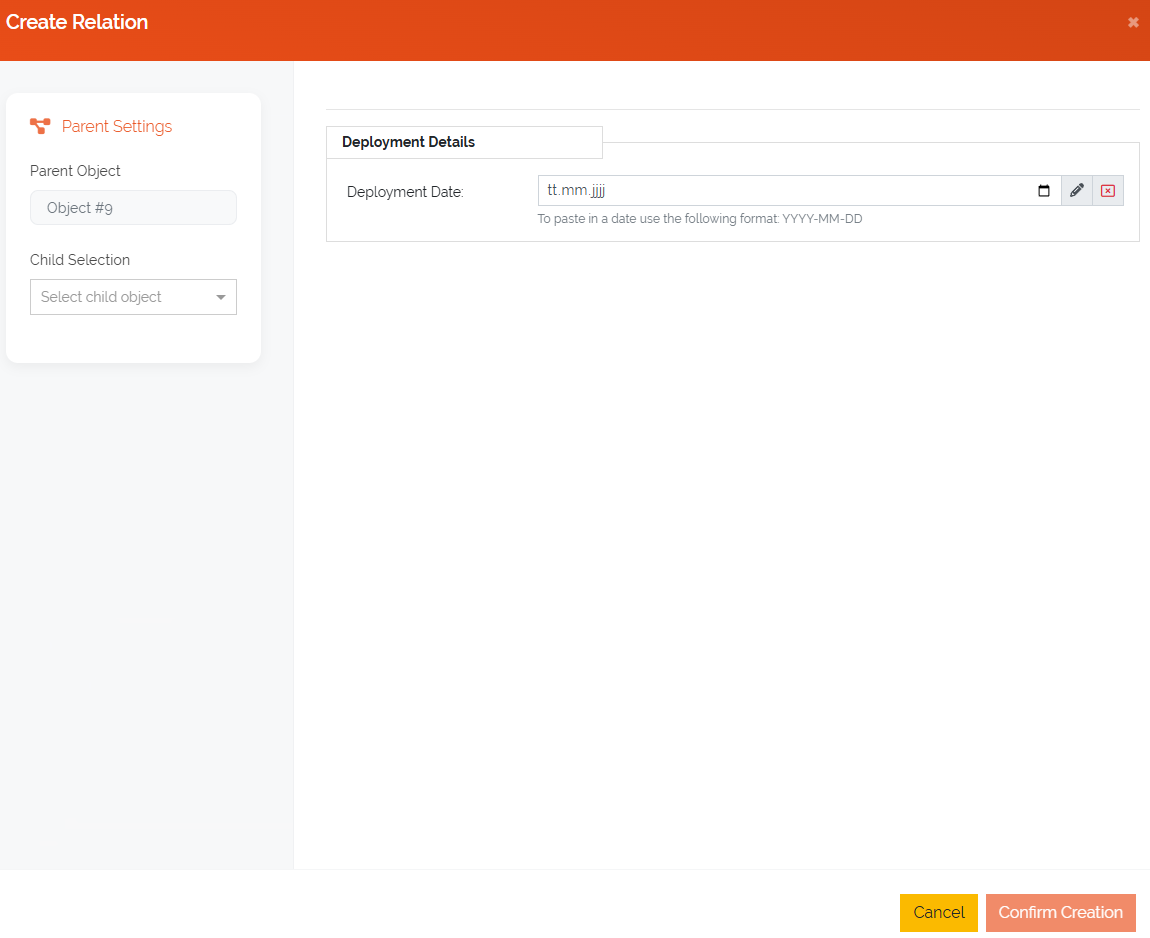
Picture: Fill out relation fields and select the related Object
Once saved, the relation will appear in the current Object’s detail view — in the same area where the “Add Relation” button is located. For each relation type, a separate tab is created using the corresponding relation name (e.g., “runs on”, “assigned to”) based on the relation’s direction and context.
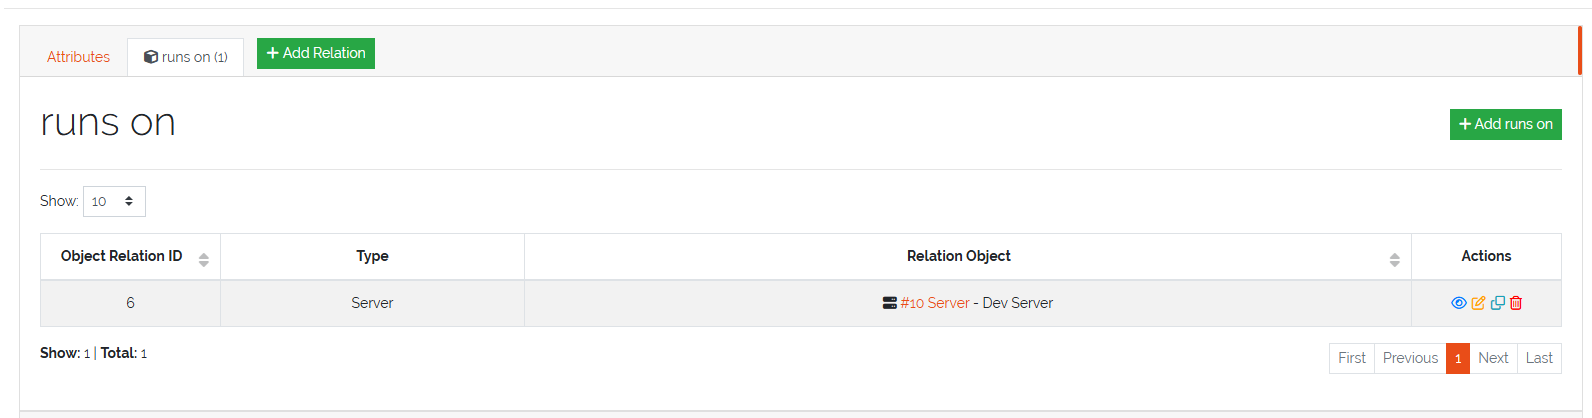
Picture: Overview of created relations
In the newly created tab (named according to the relation type), all existing relations of this type are displayed in a table. Each entry in the table includes action buttons: View, Edit, Copy, and Delete
Additionally, an “Add” button is available to create new relations of this type between the current Object and other valid counterparts. Since the relation type is already defined in this context, clicking the button takes the user directly to the second step of the creation form — where they can fill in optional relation fields and select the related Object.
Once a relation is created, it becomes visible not only in the originating Object’s tab but also in a corresponding tab on the counterpart Object. For example, if an Application is linked to a Server via a “runs on” relation, the Application will appear in the “hosts” tab on the Server’s detail view.