License Management
License Management lets an administrator turn a Community (free) DataGerry instance into the Self-Hosted Edition and unlock its premium features. You generate a machine-bound activation request, exchange it for a license file in the DataGerry service portal, and import that file to activate the license. The page also shows the status of the current license and lets you remove it.
Note
License Management is available on on-premise installations only. In the Cloud Edition all licensed features
are managed by your subscription, so the page is not shown. Access additionally requires the base.license.view
permission.
Opening License Management
Navigate to Settings → License Management (/settings/license).
Depending on the current license state, the page opens in one of two modes:
On a Community or Expired instance it opens directly in the activation wizard.
On an active Self-Hosted instance it shows the license overview.
Viewing the current license
On an activated instance the license overview card shows the key details of the active license:
Edition and Tier
Status (Active / Expired)
License key – masked to the last four characters; use the eye toggle to reveal the full key
Subscription ID
Validity – valid-from / valid-thru dates (perpetual licenses show ∞)
Enabled features – the premium features unlocked by this license
If the stored license fails verification, a warning with a status-specific message is shown above the card (for example License expired or License not recognized on this machine).
From the overview header you can:
Import license – re-enter the activation wizard to import a new license file (requires
base.license.edit).Remove license – after confirmation, delete the license and return the instance to the Community edition (requires
base.license.delete).
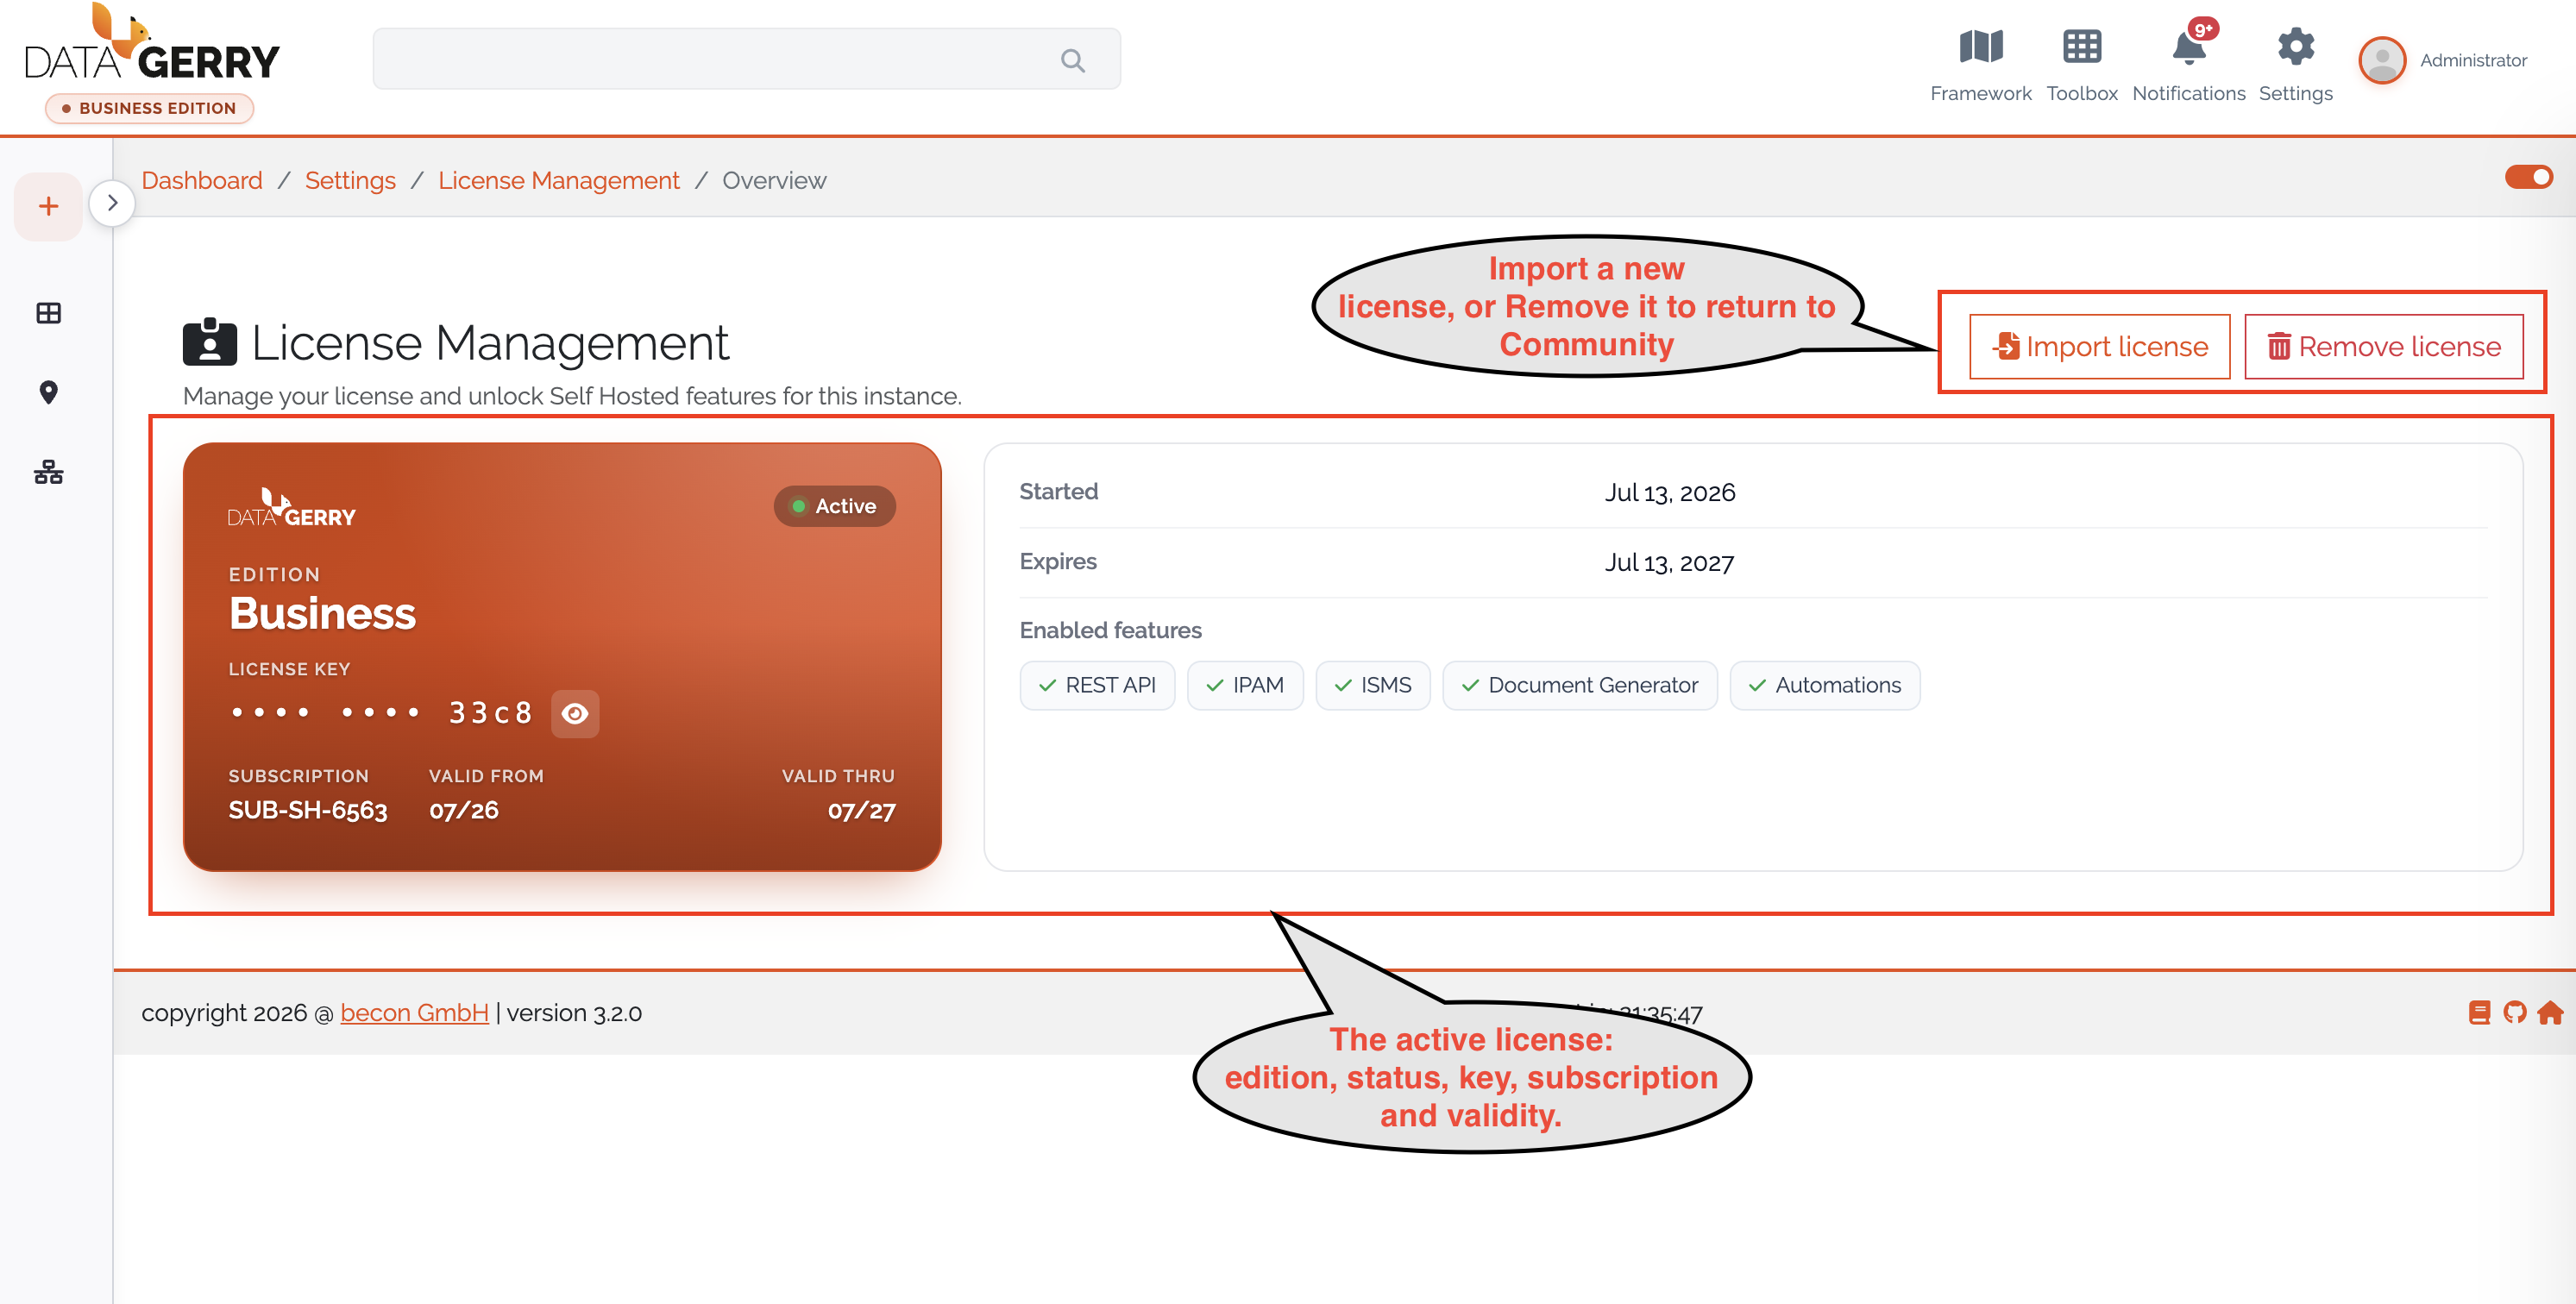
Picture: License overview of an activated instance
Warning
Removing a license immediately disables all Self-Hosted features and reverts the instance to the Community edition.
Activating a license
The activation wizard guides you through four steps. The stepper on the left shows your progress.
Step 1 – Generate request
Click Generate activation request. DataGerry creates a request that is bound to this machine and displays it as a
Base64 text block. You can Copy it to the clipboard or Download it as datagerry-activation-request.txt.
Note
The activation request is valid for 60 minutes.
Click Continue to proceed.
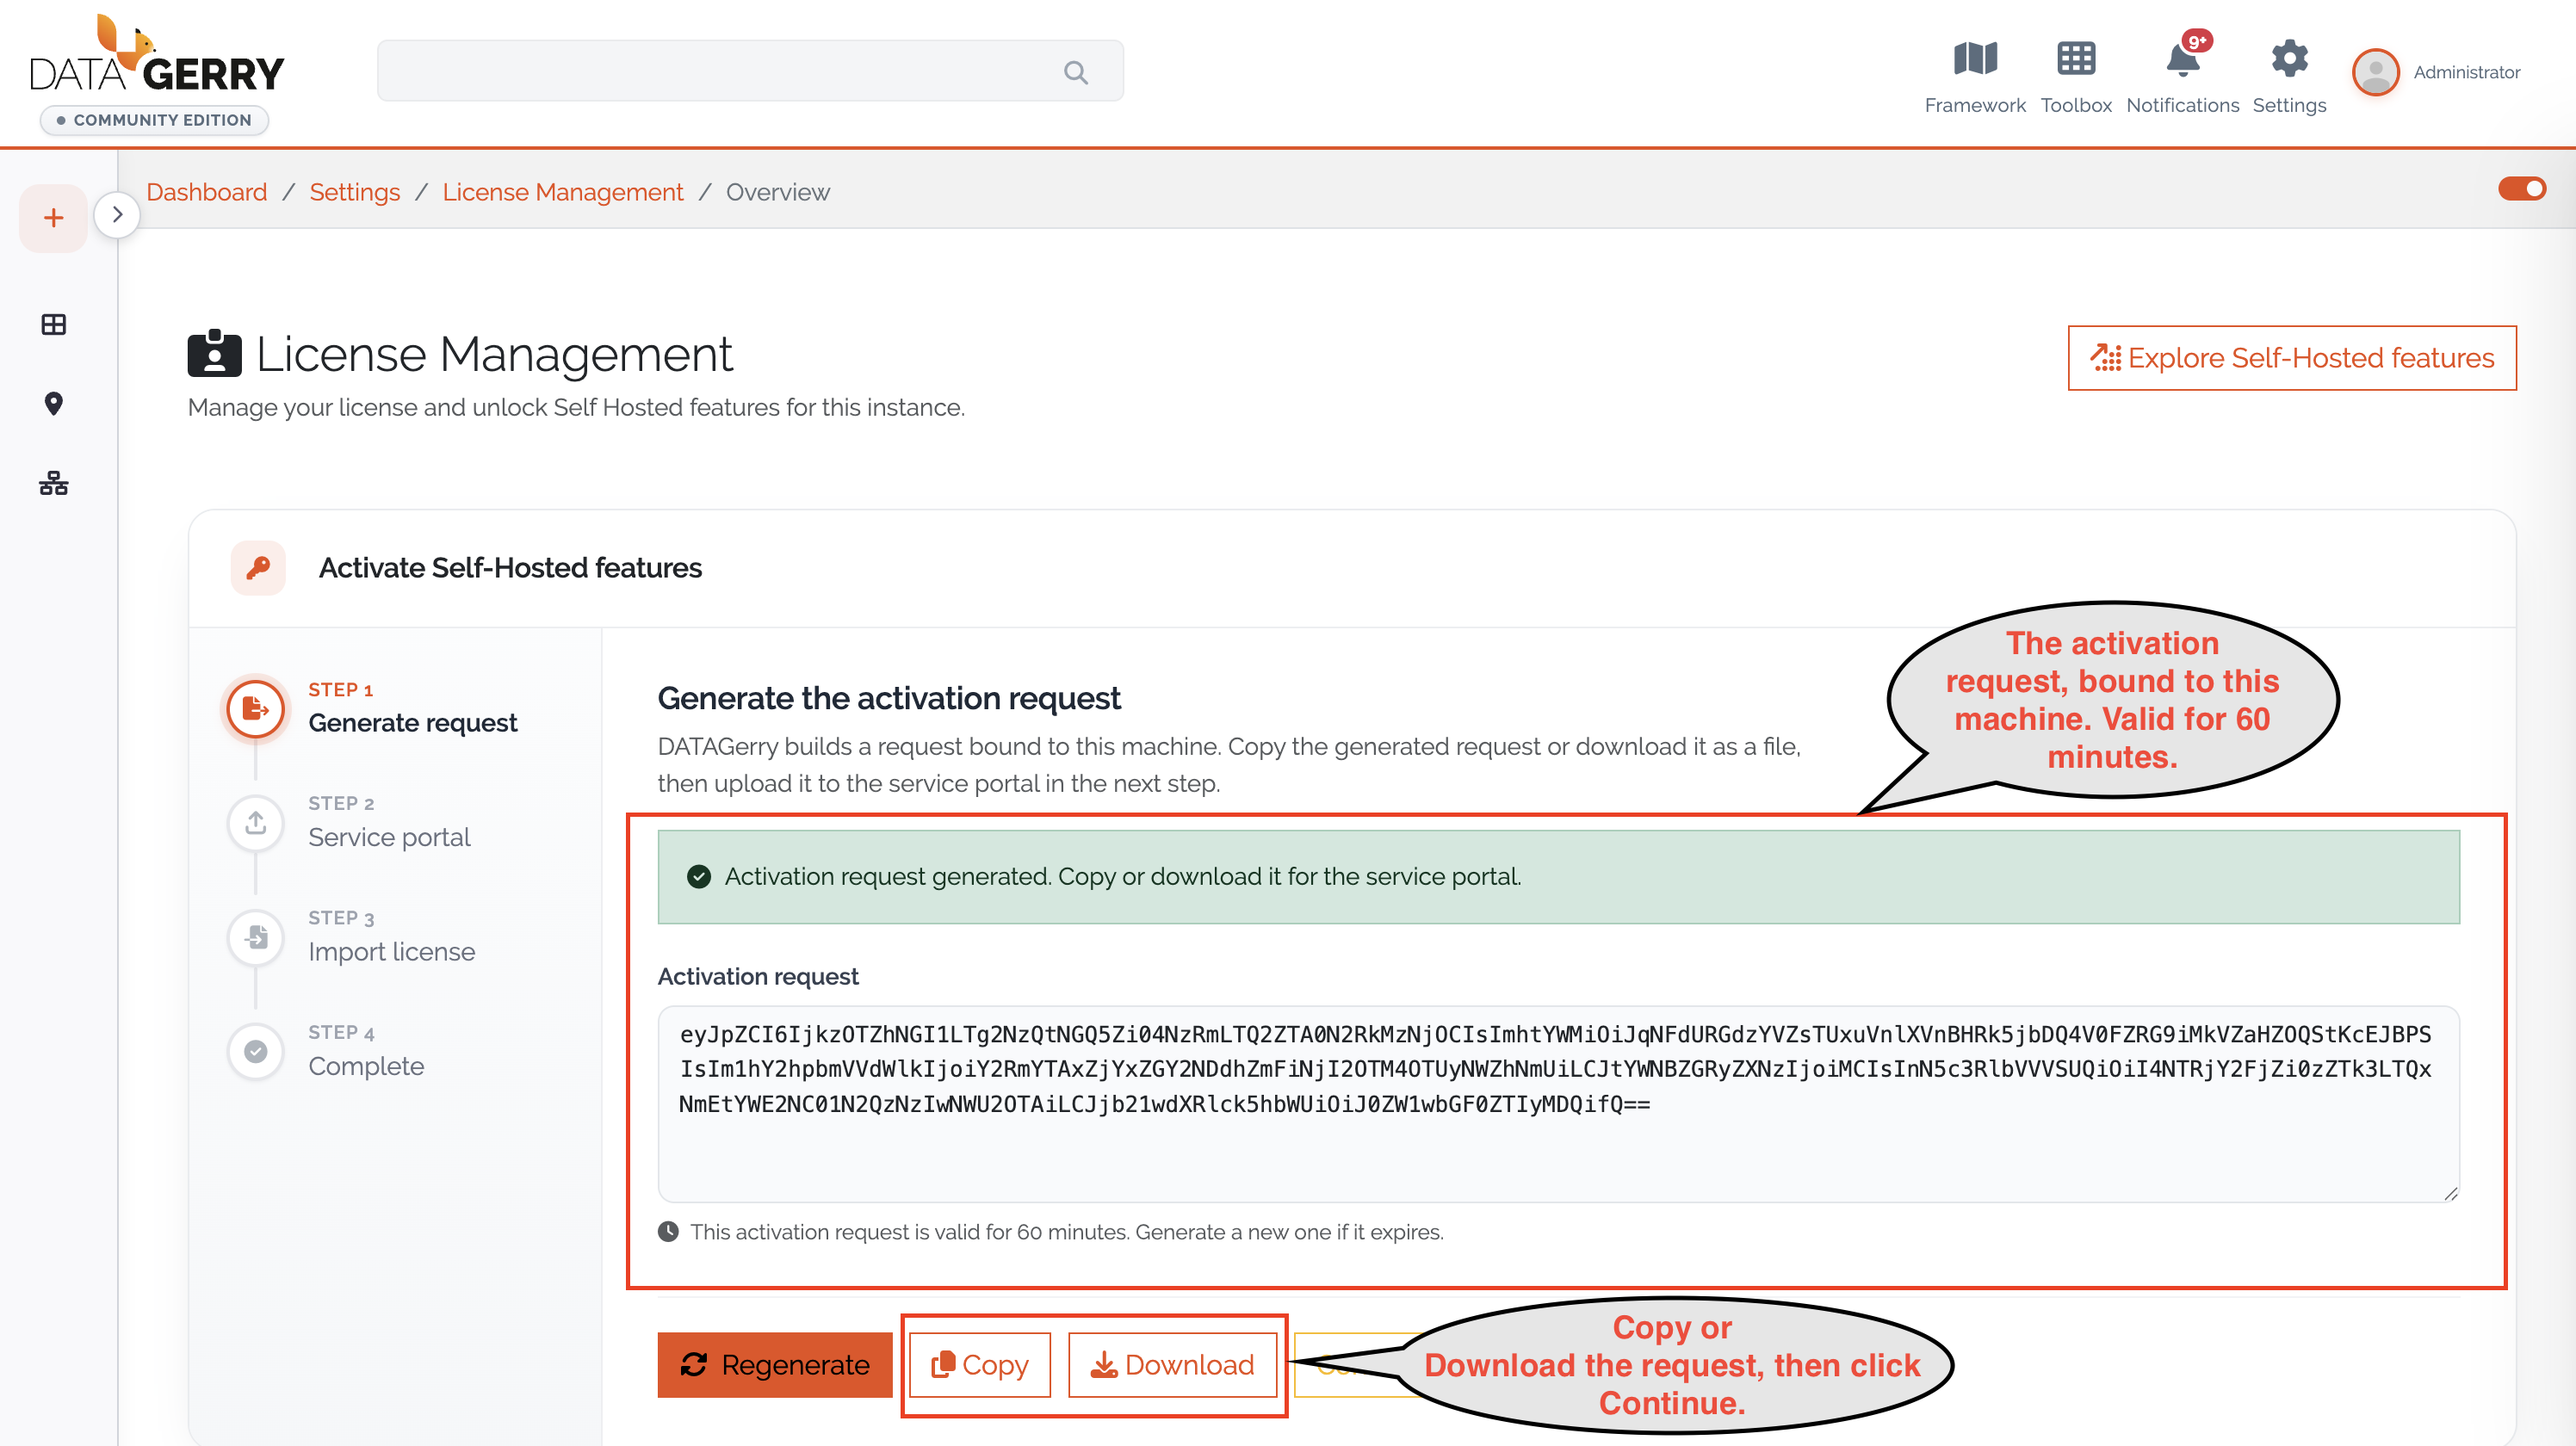
Picture: Generating the activation request
Step 2 – Service portal
Open the DataGerry service portal at service.datagerry.com, go to the license management section, upload (or paste) the activation request, and download the resulting license file. Then click I have my license file.
Step 3 – Import license
Drag and drop the license file into the drop zone, or click to browse for it. Once a file is selected, click Activate license.
Warning
Import the license file within 60 minutes of generating it in the portal. After that it expires and you must start again from Step 1.
Picture: Importing the license file 1
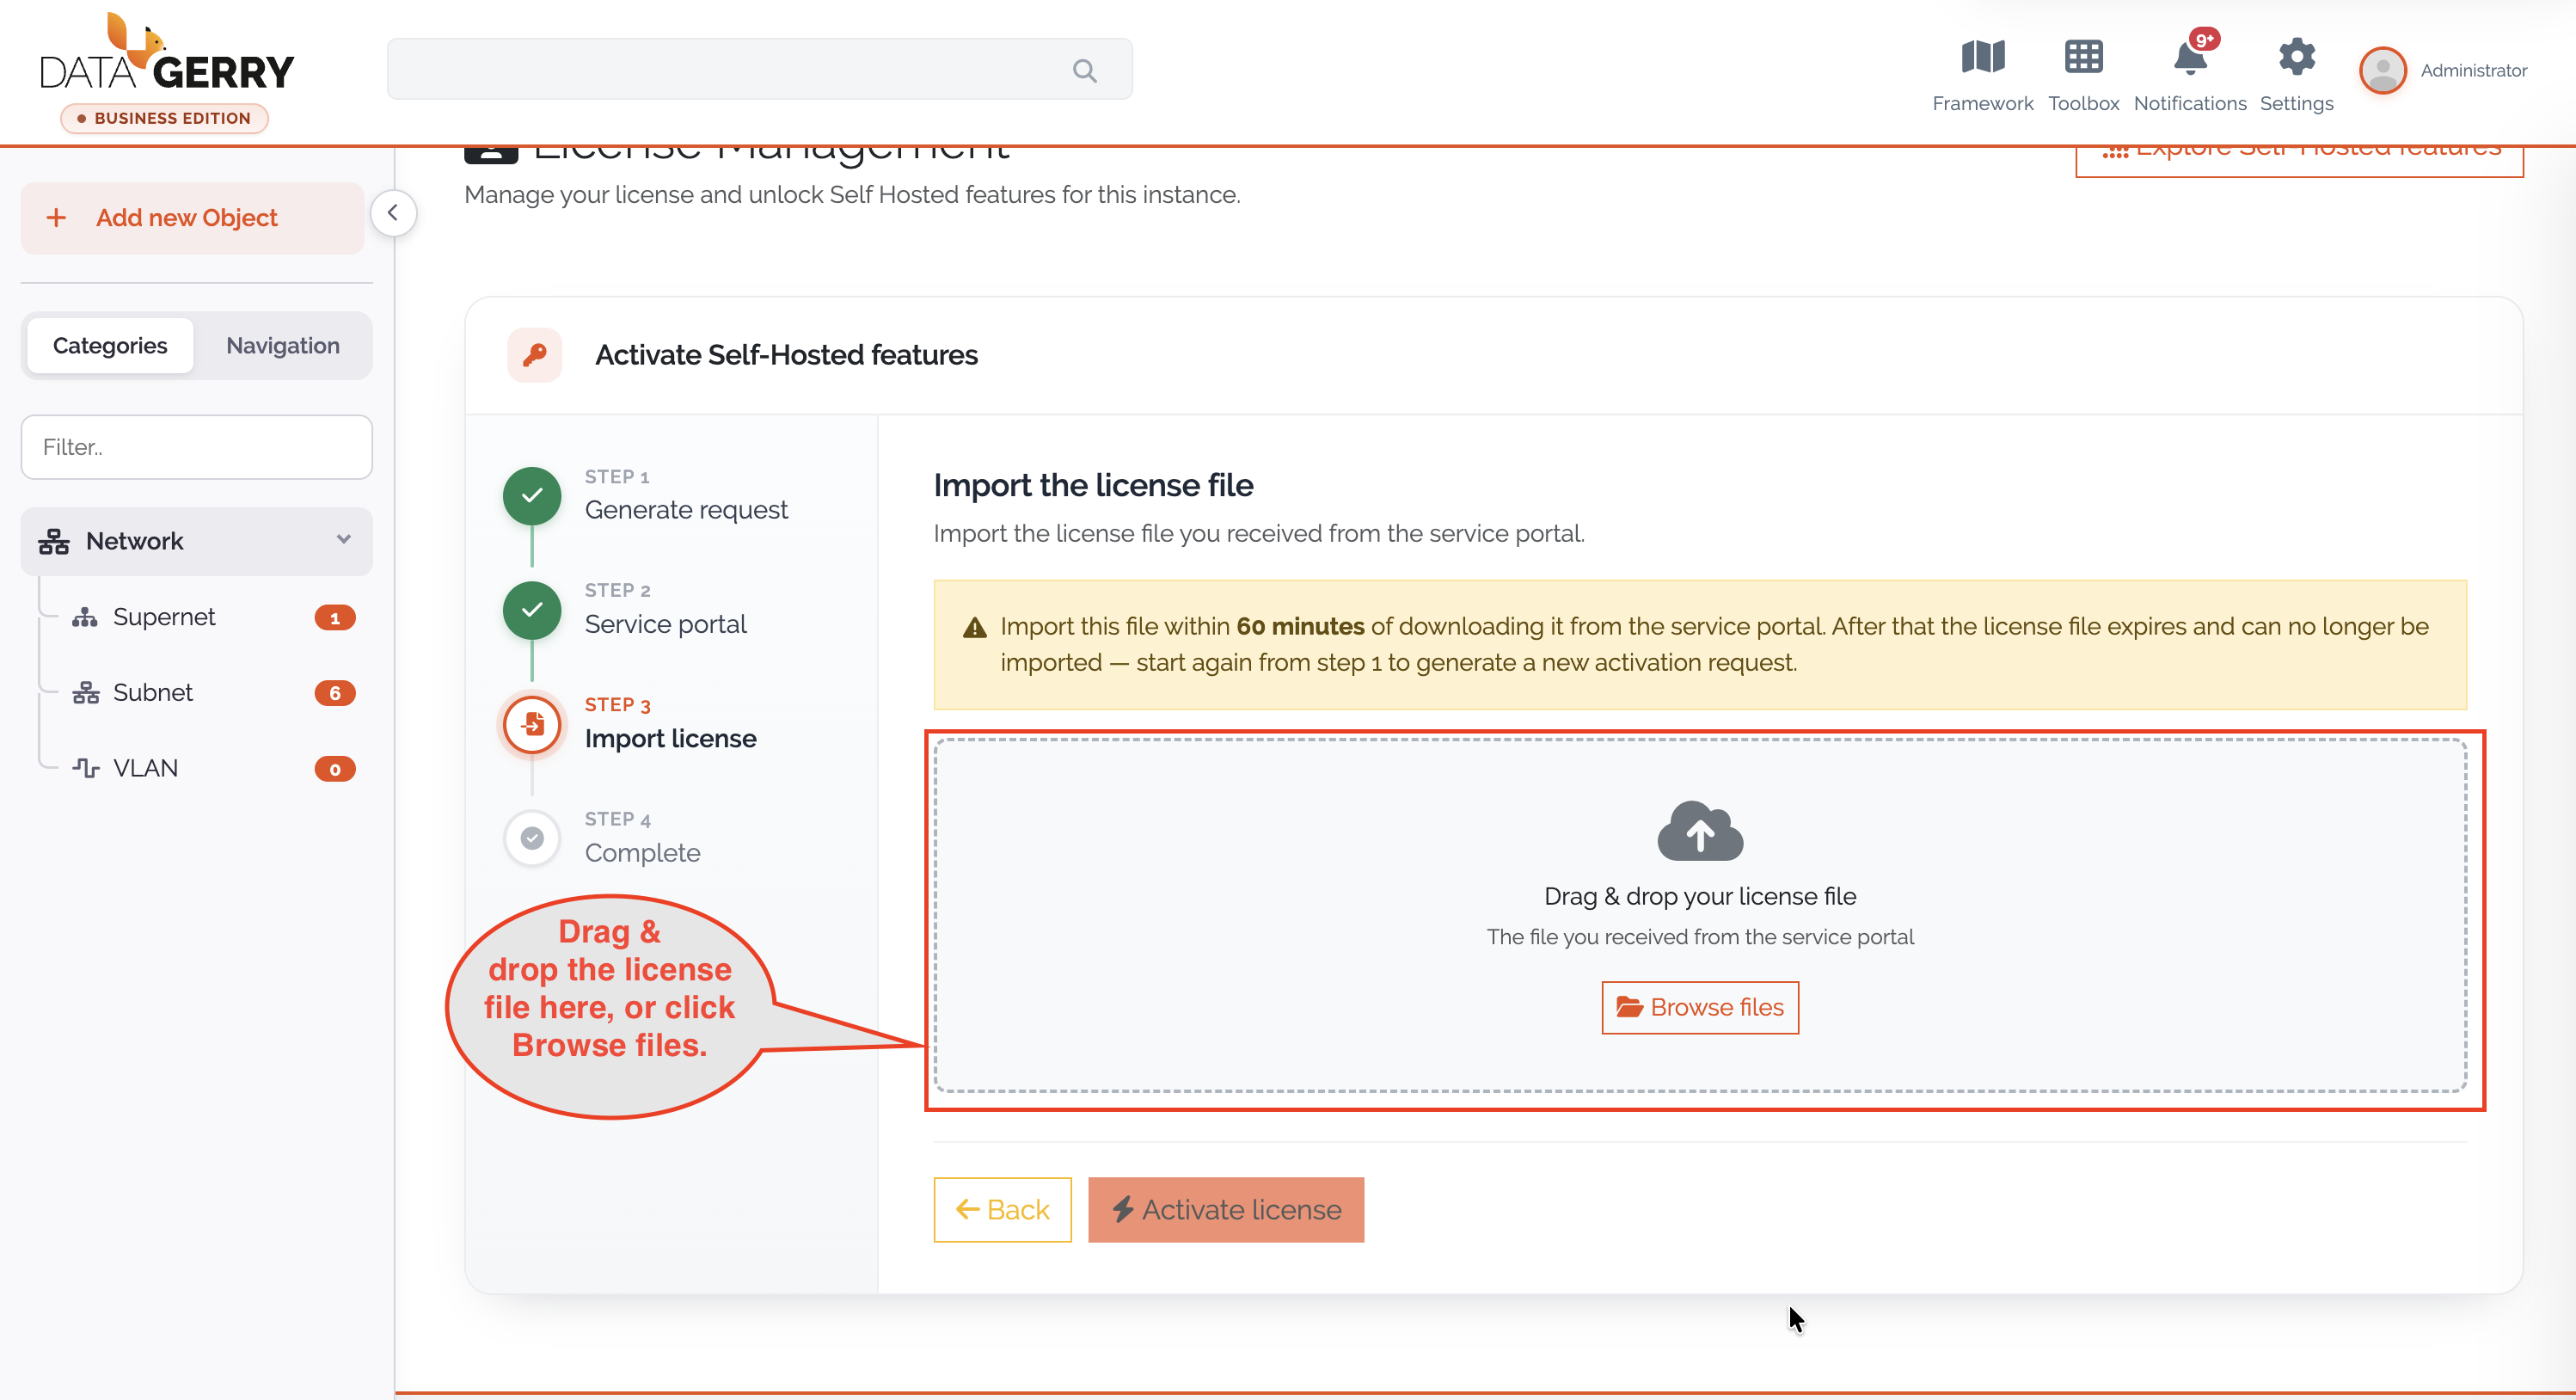
Picture: Importing the license file 2
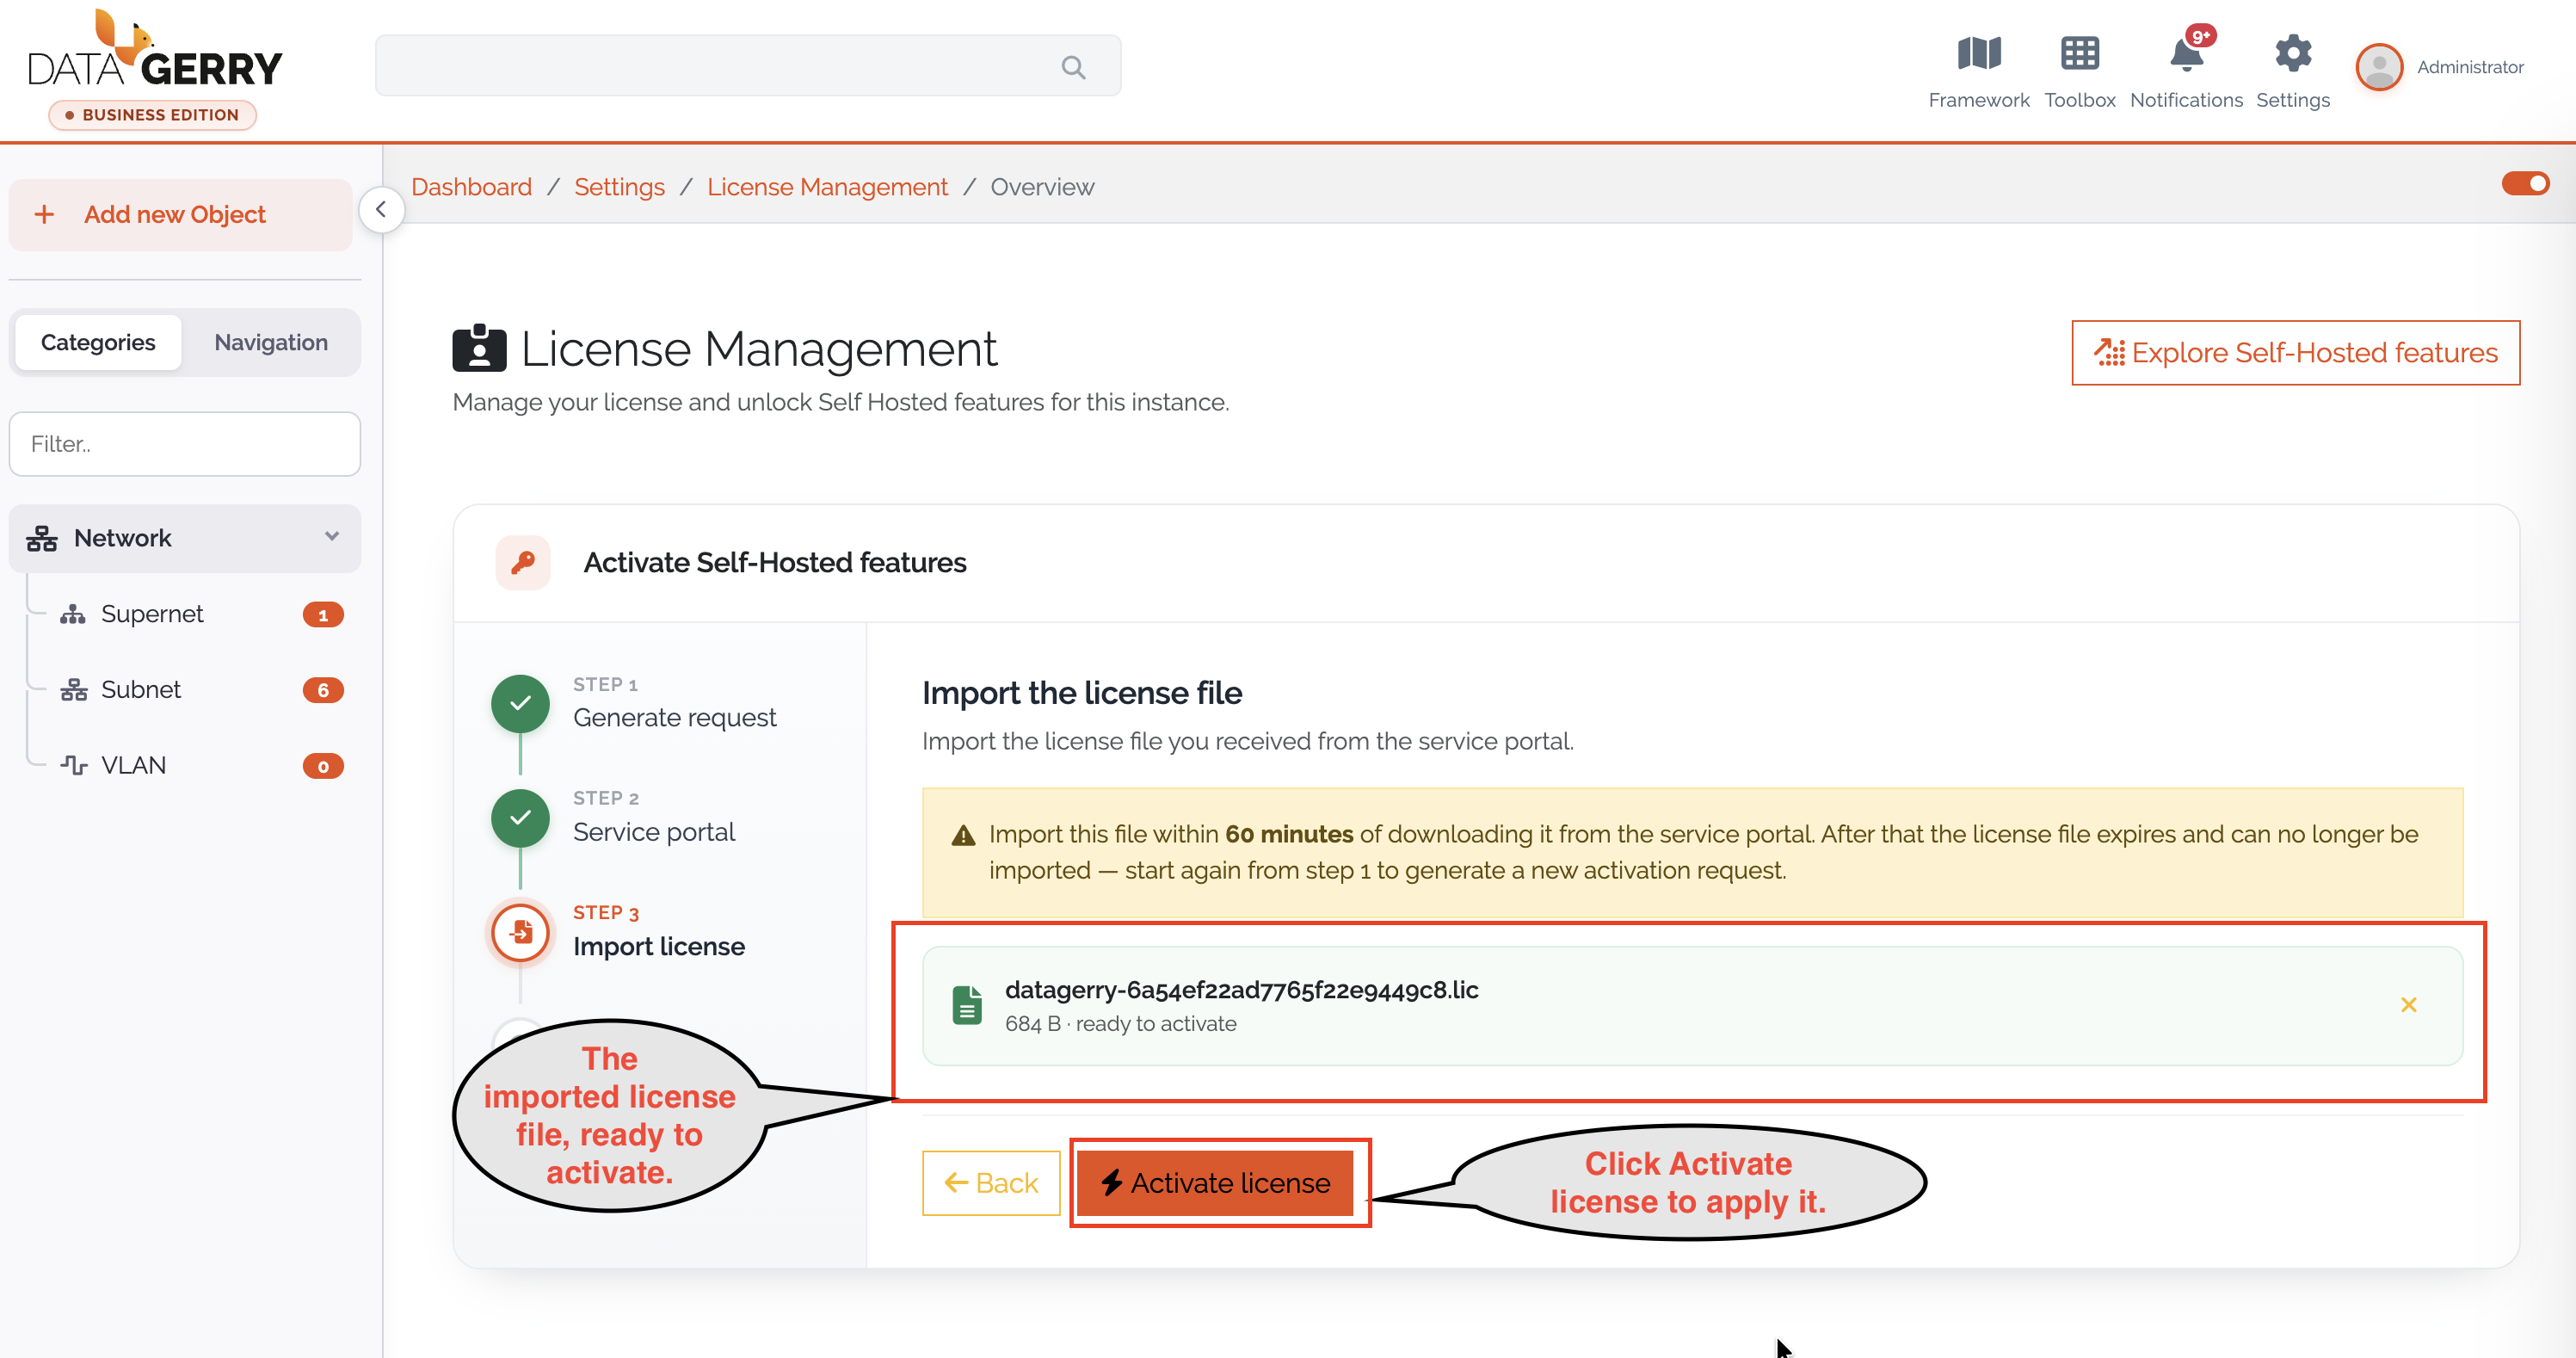
Picture: Importing the license file 3
Step 4 – Complete
After a successful import the wizard confirms that the license is verified and that all licensed features are now active. Click Finish to close the wizard. The unlocked features become available immediately, without reloading the application.
License states
The instance edition is derived from the license:
Community – No valid license; only the core CMDB features are available.
Self-Hosted – An active, verified license; the licensed premium features are unlocked.
Expired – A stored license whose validity period has ended; premium features are disabled until the license is renewed and re-imported.
When a stored license cannot be verified, the page shows one of the following:
License could not be verified – The file is corrupted or malformed; import a valid license file.
License not recognized on this machine – The license does not match this machine’s fingerprint; generate a new activation request and have the license re-issued.
License not active yet – The license start date lies in the future.
License expired – The validity period has ended; renew and re-import.
Note
Licenses are bound to the machine they are activated on. Moving a license to a different machine requires a new activation request and a re-issued license file.